Table of Contents
Linux
This section describes how to use Linux as a development environment for OpenMRN applications. Before you begin, a couple of pointers on packages you may want to have before you begin the procedure:
- gcc
- make
- binutils
- git
- doxygen
- avahi
Note Use Oracle’s JRE instead of the OpenJDK’s offering if you want to use JMRI or STM32CubeMX.
Using the OpenJDK version of JRE (on Debian and related distros) currently causes a total hang of JMRI on launch.
Use your package manager for the distro that you are running to verify they exist on your system, or install them so you are ready.
OpenMRN Location
The build system for OpenMRN is quite intelligent. It is designed to find the OpenMRN source tree in one of three separate locations in the following order:
- OPENMRNPATH environment variable
- /opt/openmrn
- ~/openmrn
Sometimes it is useful to use a symbolic link to point one of these paths to an alternate OpenMRN source tree.
Targets
The build system for OpenMRN allows the source code to be easily targeted to many different architectures including, but not limited to, linux.x86 and freertos.armv7m. Supporting new targets is as simple as adding a target specific makefile to the etc/ directory and duplicating a build tree in the targets/ directory. If a given target's tool chain is not installed, the build system will skip the build of the target and display a simple warning. In this way, a developer can install tools only for the targets they are interested in, and build only for the targets they are interested in.
x86 Linux
Most Linux distributions will contain everything needed to build the example for the linux.x86 target in their base install. The minimum requirements are gcc, g++, binutils, and GNU Make. To build the example, simply navigate to the root of the OpenMRN tree and run make.
Running of the example requires a USB-to-CAN converter that uses the Grid Connect protocol. RR-Cirkits (http://www.rr-cirkits.com) is the current source of these devices. One can navagate to the test/targets/linux.x86 directory and run "./test /dev/ttyUSB0". /dev/ttyUSB0 is the default path for accessing the USB-to-CAN device if no other USB to serial adaptors are in use. It is highly likely that the device may also be found at /dev/ttyUSB1, /dev/ttyACM0, etc...
You may need, depending upon your distribution, to add your user account to the dialout group and/or set the device object (aka /dev/ttyACM0 or whatever device your USB-to-CAN device has made itself) to security mode 666 (aka Read and Execute).
The example periodically produces an event and consumes an event. The example demonstrates the internal loopback capability in addition to interaction on the CAN bus. Using JMRI and a second USB-to-CAN adapter, one can view the node interacting on the bus.
ARM Cortex-M FreeRTOS
The current common hardware platform is the STM32 series development boards from ST. The various Nucleo boards are inexpensive and powerful. The openmrn software uses the FreeRTOS (Free Real Time Operating System) to provide a basic level of functionality. This base level lets openmrn provide the OpenLCB (LCC) functions without having to worry about a bunch of housekeeping tasks. (Think of this as an application running on top of an operating system.) With that in mind, we will need to add the FreeRTOS software and set it up to be found when the software is compiled.
We will also need the GCC compiler for ARMs AND the STM F3 library. We will tackle ARM-GCC, FreeRTOS and then the STM library. If you try to compile without the F3 library, you will get a Ignoring target freertos.armv7m, because the following libraries are not installed: STM32CUBEF3PATH. error.
GCC for ARM
The compiler used is GCC as distributed with ARM's GNU Embedded Toolchain (as of this writing, we're using version 6-2017-q1-update). This compiler may be downloaded from the ARM Developer site. Please note that the 2018 Q2 version will cause errors on compile. The 2017 Q2 is known good at this time.
The OpenMRN build system will look for the compiler at /opt/armgcc/default (for specific path matching, see etc/path.mk).
If you're running the compiler on a Linux 64-bit machine, you'll likely download a .tar.bz2 package. Move the extracted folder (named something like gcc-arm-none-eabi-7-2017-...) into /opt/armgcc and make a symbolic link named default that points to this folder. Example:
If you did this correctly, the output of ls -l /opt/armgcc should be, roughly:
FreeRTOS
The build system also looks for a version of the FreeRTOS tree. Versions that are acceptable are 8.2 and newer. At this time, version 9 or newer would be recommended. If you are working on a clean build platform (in other words, if you aren’t building any other FreeRTOS based projects on this same machine), then Version 10 is suggested. FreeRTOSV10.1.1 has been tested successfully as part of the Nucleo & DevKit combo. FreeRTOS can be downloaded from the FreeRTOS web site (http://www.freertos.org/). The build system will look for the FreeRTOS source tree at /opt/FreeRTOS or ~/FreeRTOS. It is often convenient to use a symbolic link to locate the tree. For example:
The STM Libraries
The ARM processor actually has a bunch of families with a mix of different features, specifications (Flash memory, RAM, EEPROM, etc) and clock speeds, not to mention the actual fab size of the die. If you like that sort of thing, the ARM architecture page at https://en.wikipedia.org/wiki/ARM_architecture is fascinating reading. Anyway..
We will need the STM32 library for the family we are using. You can tell this information by the what sort of Nucleo board you have. If you have a Nucleo board that is model “Nucleo-F 3 03RE” then you have a F3 family and need that library. If you have a “Nucleo-F 0 91RC” then you have a F0 family and need that library. No matter the library, you can get it from ST. You will need to register with the ST site to be able to download the software.
Go to: https://www.st.com/en/embedded-software/stm32cube-mcu-packages.html?querycriteria=productId=LN1897 and a list of the family software will be shown. Click the family you need, and a window will slide open.

Then click the Tools&Software link you see at upper right of that window. That will drop you to https://www.st.com/content/st_com/en/products/embedded-software/mcus-embedded-software/stm32-embedded-software/stm32cube-mcu-packages/stm32cubef3.html#sw-tools-scroll and should scroll you to the bottom.

Click the “Get Software” button, accept the license agreement that pops up, and then either click the login button or put your details in. Your download should start after. (And no, I have no idea why they haven’t Web2.0’d that step out..) After the file downloads, you will want to extract into whichever location that you have been using. This example uses /opt, so, extract it your preferred way and then you are ready to move it around:
An alternate paradigm is using the ‘default’ link target, like so:
Now, your output of an ls -l should look something like this:
Now, you should be ready to compile!
Some pointers about the make command
Make is powerful and when setup, makes it easy to build software from source. You have to keep in mind that it is running what a Windows user might think of as a batch file; properly here in the Unix world, a shell script, so it won’t know everything that has gone on, so a good process is helpful for best results.
Deletes the files that a make creates; use this after you tweak the source, but before you recompile with a plain make. See the next step.
Will just commence the software build, according the makefile. You should not have to mess with the makefile so if the output from make is a bunch of errors, check your paths and libraries. The openmrn build system is good about giving hints on what’s missing.
The -j switch is to increase the number of jobs (commands) to be run simultaneously. If you have multiple processor cores, the -j switch will speed the compile. The suggested use of the command is you add the number of virtual cores to 1 to get your number. For a CPU without hyperthreading, but 2 cores, you would use -j3, but if you had a 4 core CPU, with hyperthreading, then you would use -j9 as from a logical perspective, you have 8 cores.
If you have OpenOCD installed, this option will build the software, create the binary automatically, and download it onto the board in one fell swoop. Please note that the OpenOCD installation instructions are still in progress.
Building the software
Compile the blink_raw application for the freertos-armv6m-st-stm32f091rc-nucleo target like this:
If you have troubles getting the source to compile, don't set any environment variables but look closely to the location of the files and
directories because most likely a mistake is made there.
The output of the make process will leave you with a *.elf file. To make it a binary that you can drop onto the Nucleo, run:
DevKit IO and Nucleo
If you are using the DevKit IO board and the Nucleo, you will want to compile the application at openmrn/applications/nucleo_io and the appropriate target in the target/ directory you will find under it.
As before, you will get a .elf file, nucleo_io.elf, so the objcopy command is called for here.
A Word about NodeIDs
Please note that the code from OpenMRN that you cloned down with git has a NodeID set inside it that does not conform to the standard as it, according to the letter of the law, belongs to the OpenLCB working group. You will want to change it and then factory reset the board via a CDI change to also update the EventIDs.
Older Targets
If your target is a TI Stellaris ARM Cortex-M3 or Cortex-M4F, OpenMRN includes drivers that use TI StellarisWare. The build system will look for a copy of StellarisWare at /opt/StellarisWare or ~/StellarisWare. StellarisWare can be downloaded from the TI website (http://www.ti.com/tool/sw-lm3s). Though the file extension is .exe, the file is nothing more than a self extracting ZIP file. Unpacking on a Linux system can be done with the unzip command. For example:
There are multiple supported targets for the example applications. The preferred target is something from the STM32 Nucleo family. Other examples can run on the DK-LM3S9D96 development board while the other runs on the EK-LM4F120XL development board, otherwise known as the Stellaris LaunchPad. Building for both targets is as simple as running make in the top level OpenMRN directory. After the build completes, the resulting executables can be found at test/targets/freertos.armv7m.dk-lm3s9d96/test.elf and test/targets/freertos.armv7m.ek-lm4f120xl/test.elf. See the OpenOCD JTAG Debugger section for more details on downloading and stepping through the code.
ARMv7-m Nuttx
The armv7m.nuttx target is still under development. This target is not recommended for stable development.
OpenOCD JTAG Debugger
Before we begin, please note that simply building (compiling) the software does not require setting up OpenOCD or Eclipse. You can happily and simply use the command line tools available to do so. That said, let’s outline the neat things possible.
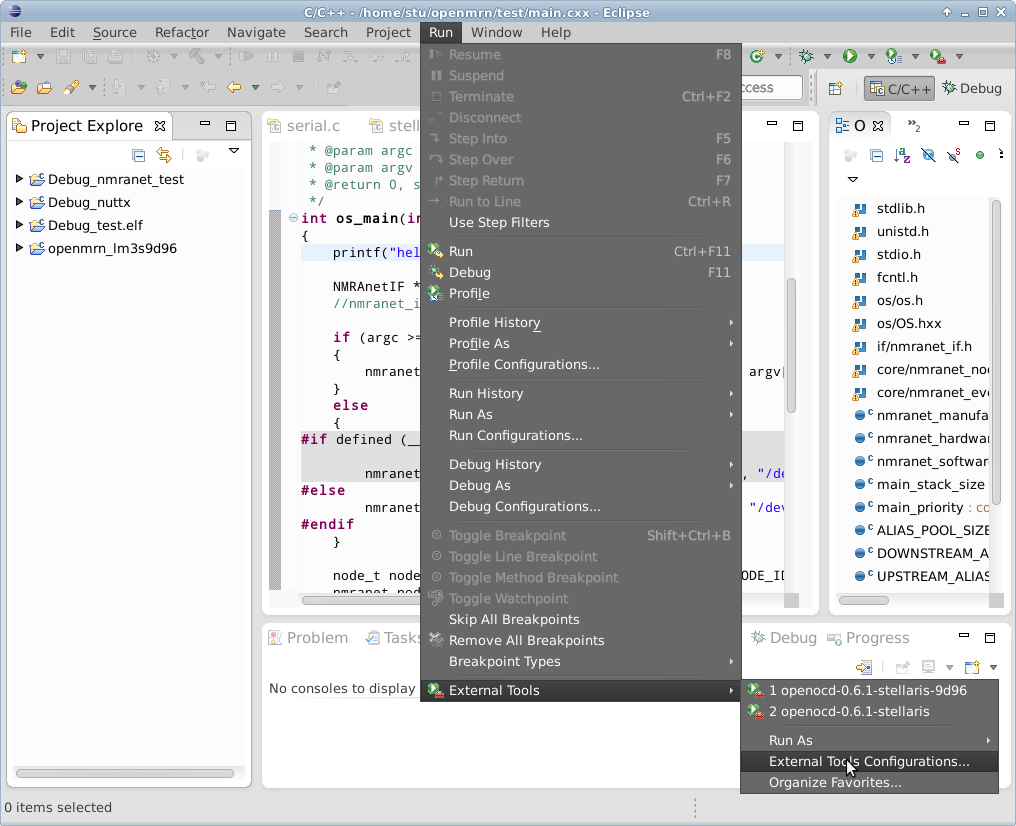
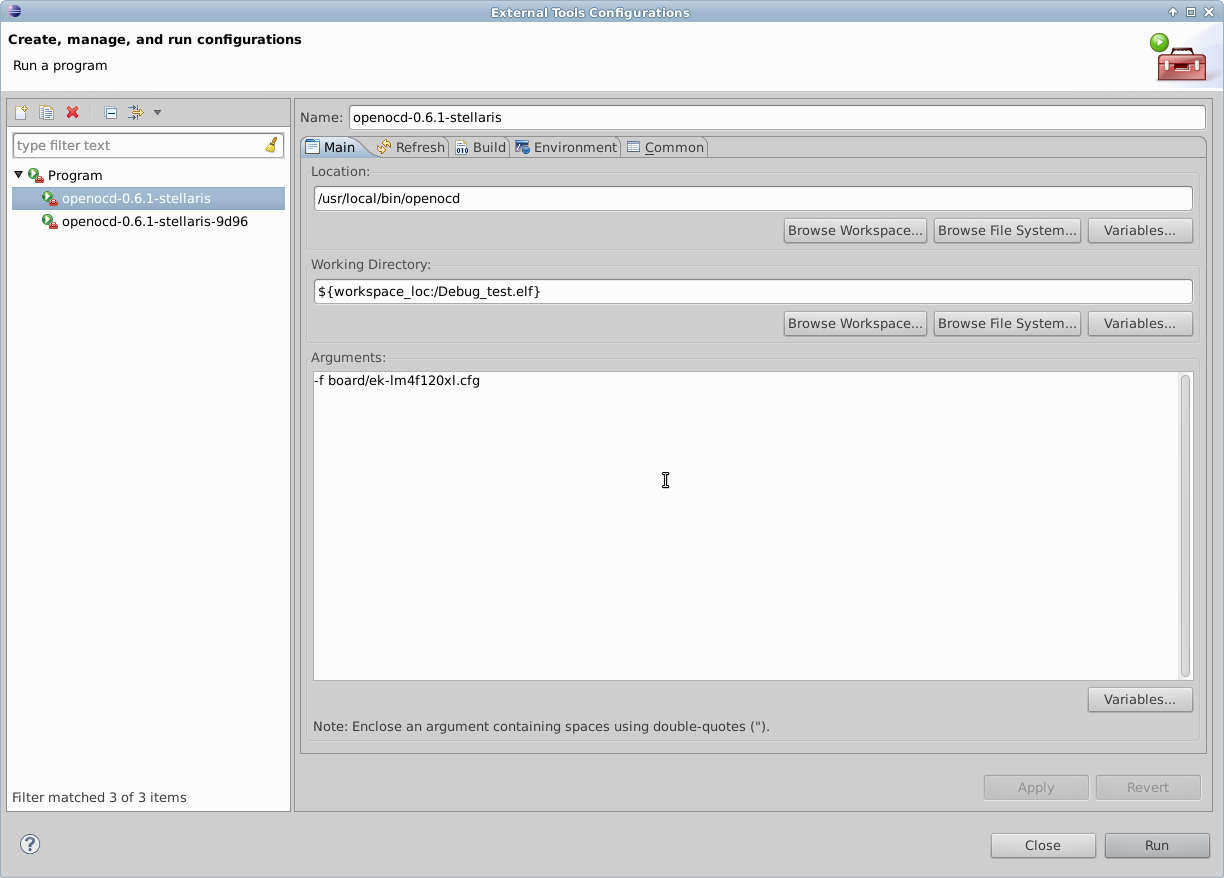
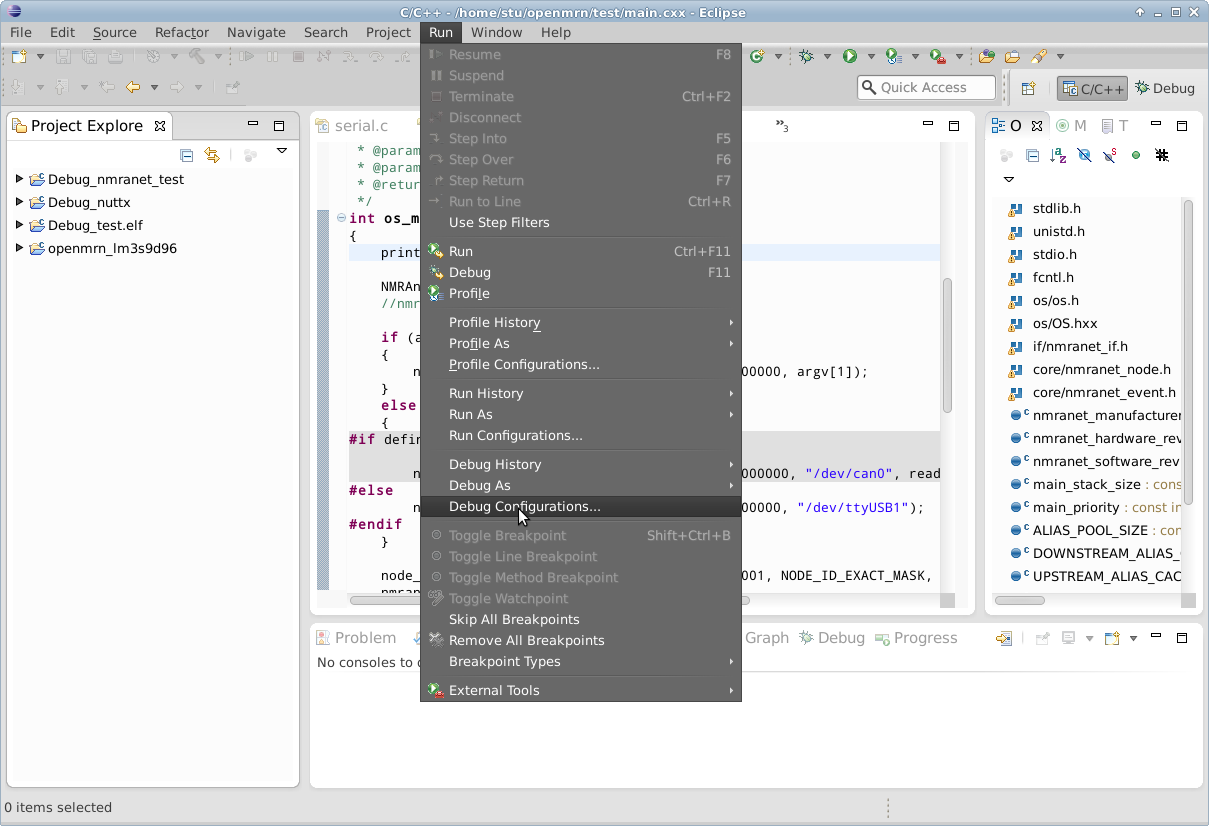
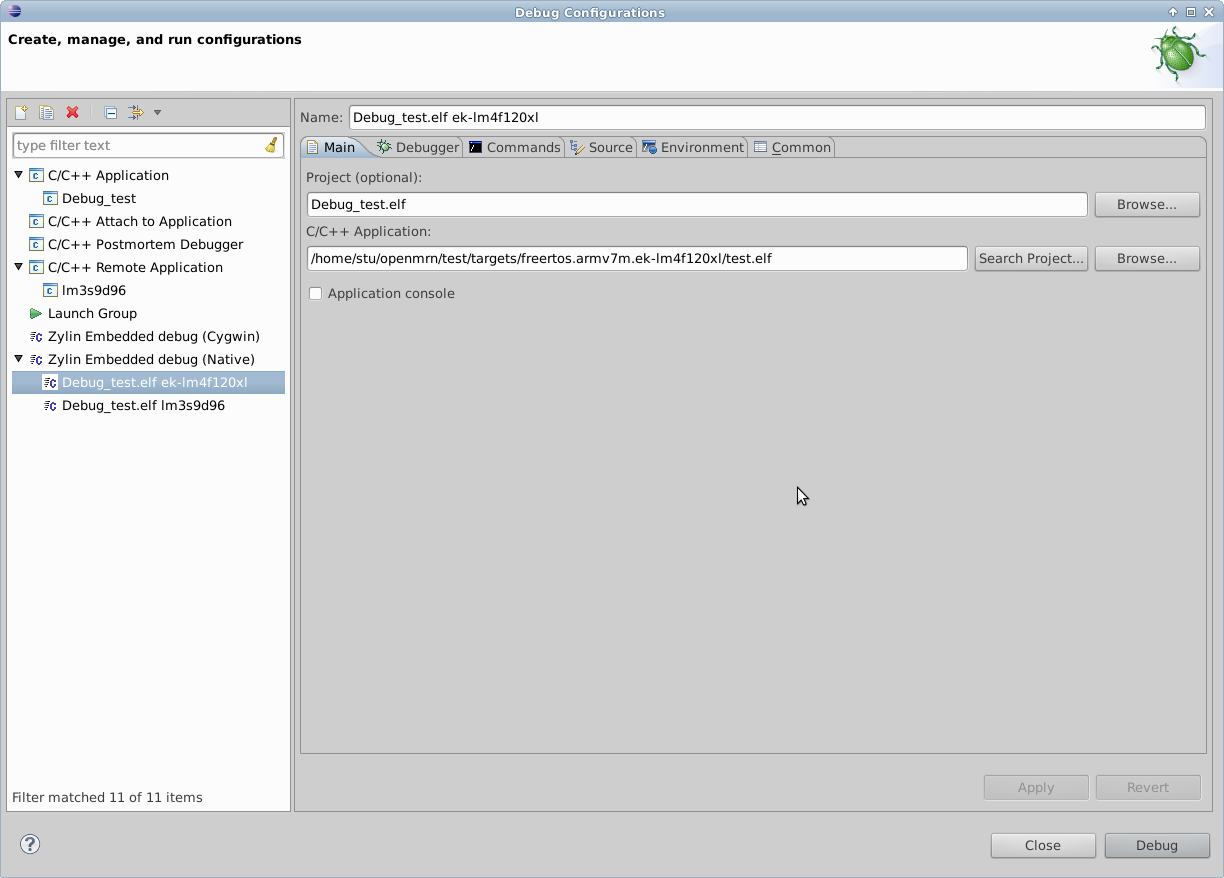
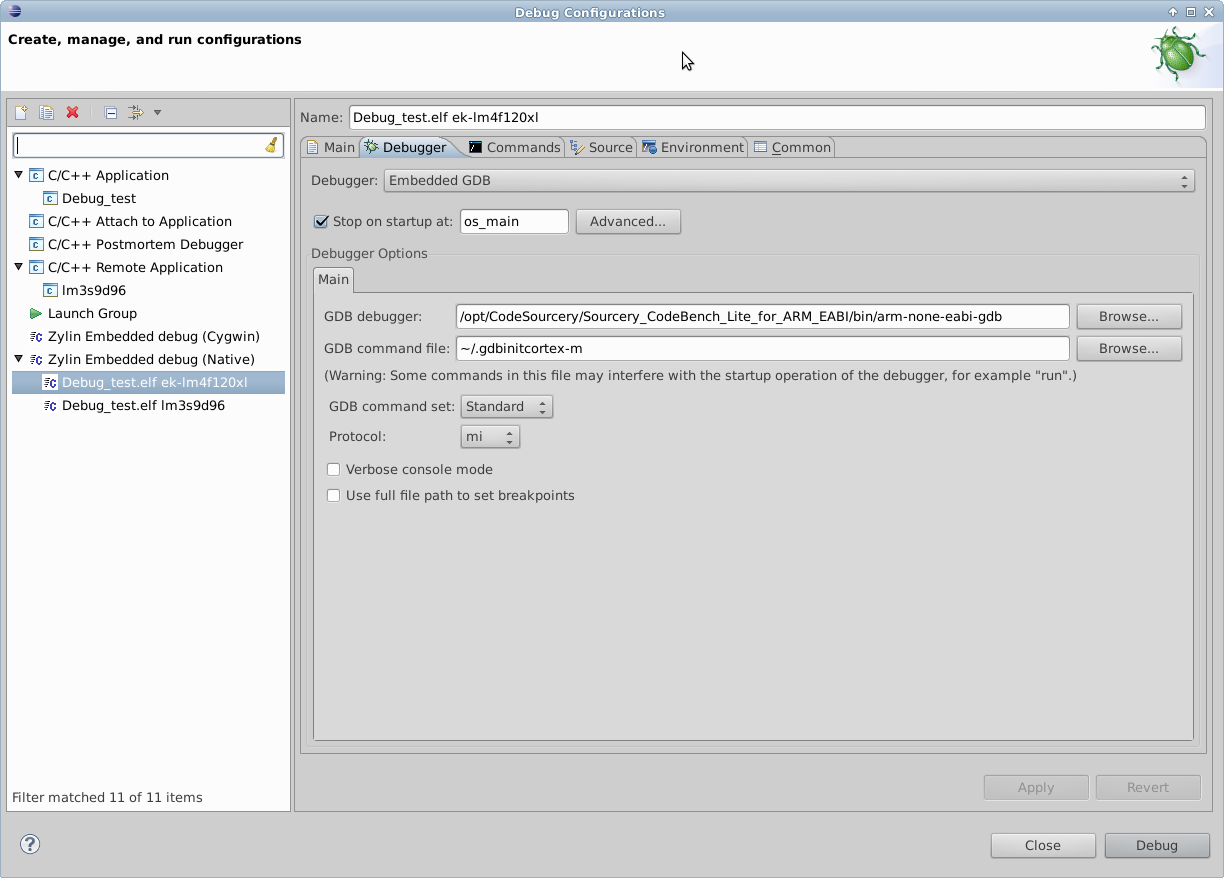
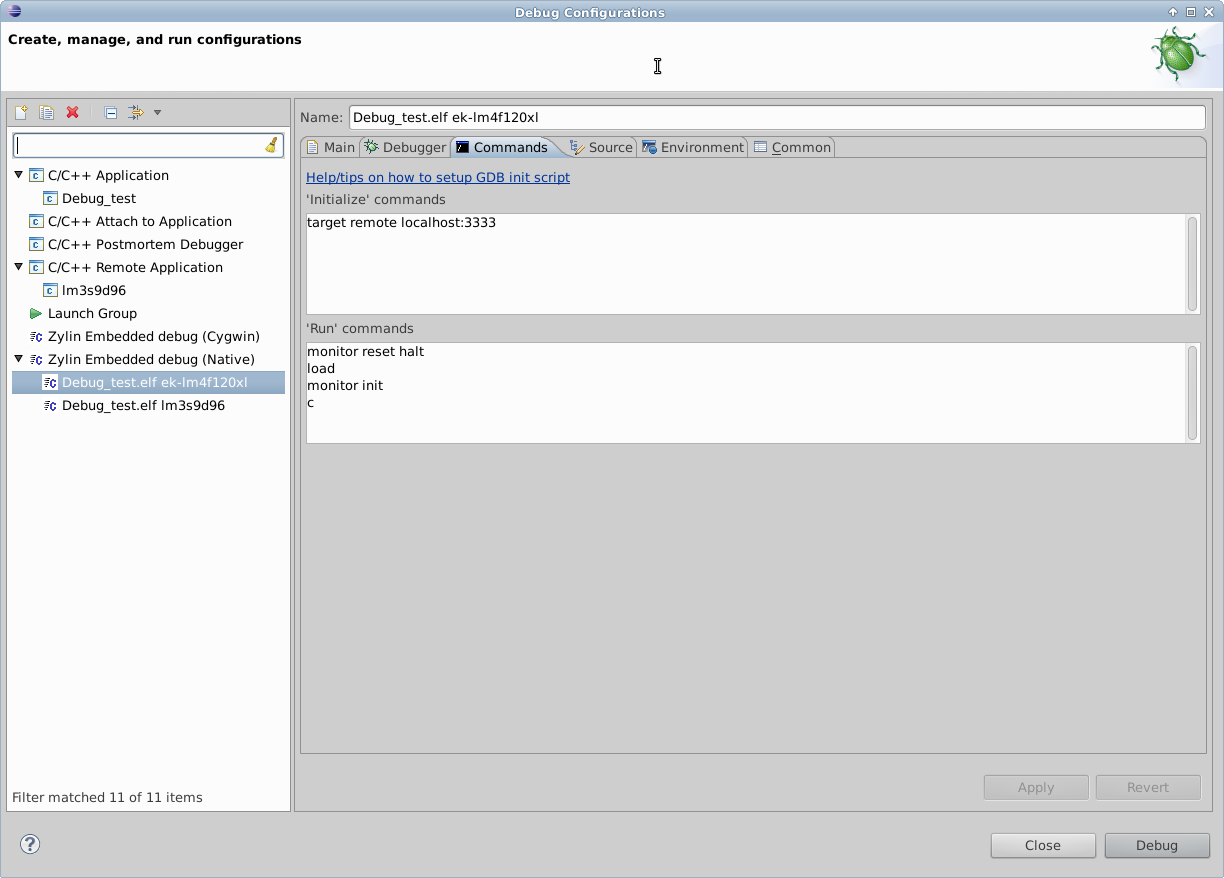
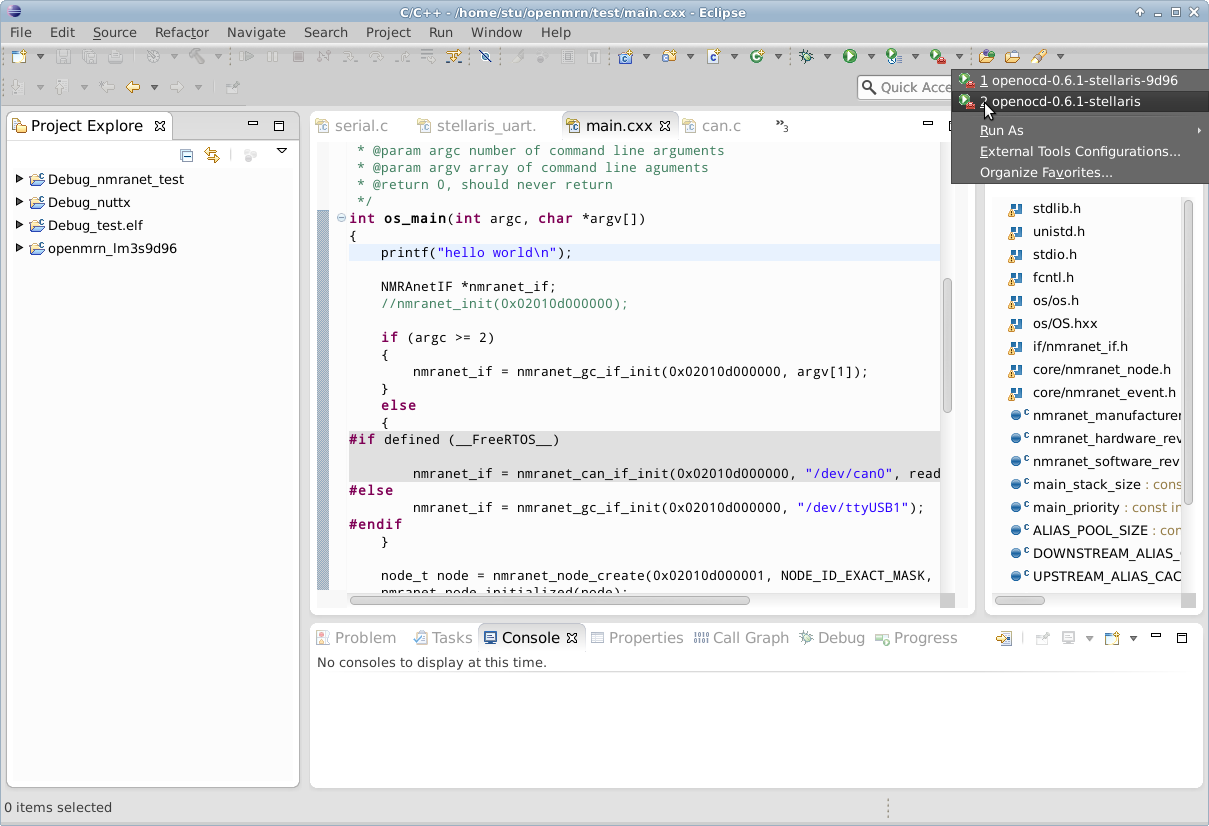
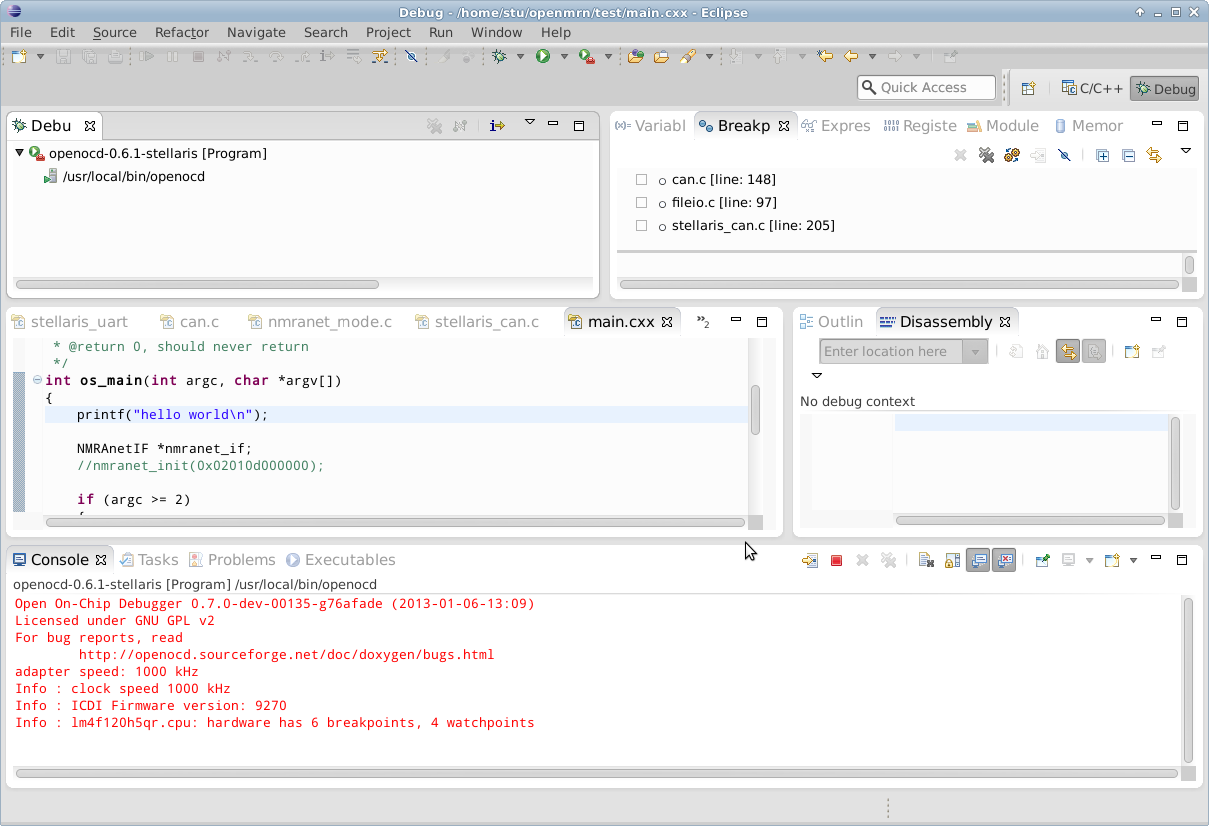
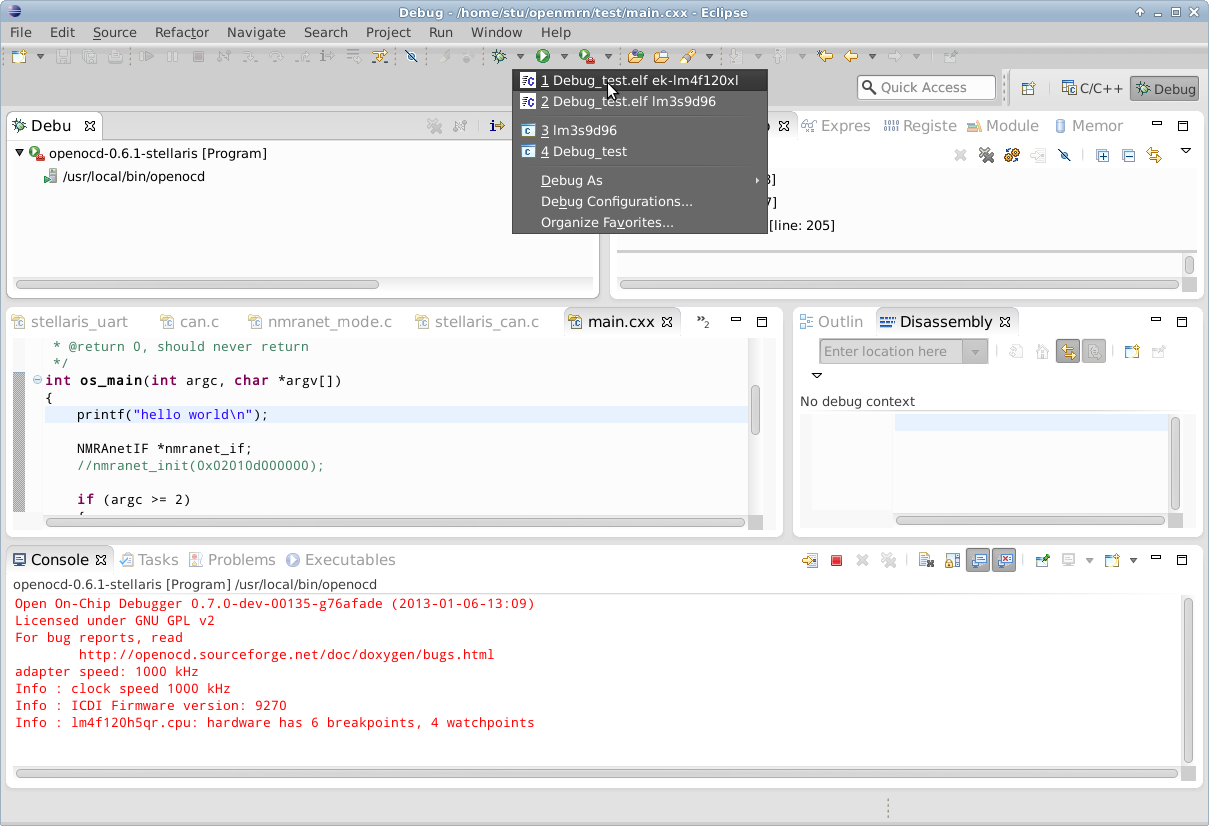
OpenOCD is an Open Source debug tool chain that can be used for debugging of embedded targets using JTAG. To use the on-board ICDI JTAG debugger on the EK-LM4F120XL LaunchPad, download, build, and install the newest version of OpenOCD software. The latest version can be downloaded from the OpenOCD web site (http://openocd.sourceforge.net/). The version prepackaged into your Linux distribution software repositories is likely too old to have TI Stellaris ICDI support. Eclipse CDT with the Zylin plug-in is a valuable front end GUI to the GNU GDB debugger used by OpenOCD. Eclipse CDT is typically available though your Linux distribution repositories, however, it can also be obtained from the Eclipse web site (http://www.eclipse.org/). Zylin plug-in instructions can be obtained from the Zylin web site (http://opensource.zylin.com/embeddedcdt.html).
Screen-shots of Eclipse setup with OpenOCD and Zylin:

Windows
This section describes how to use Windows as a development environment for OpenMRN applications.
If you get the build system working on Windows, please contribute your documentation to the project!
MacOS
This section describes how to use MacOS as a development environment for OpenMRN applications.
If you get the build system working on MacOS, please contribute your documentation to the project!